
|
General Information - Dome Safety Mirrors |
|
| INSIDE
USE:
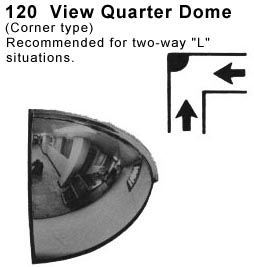
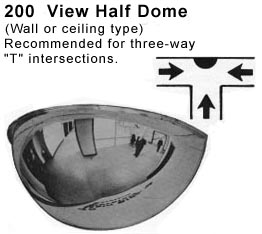
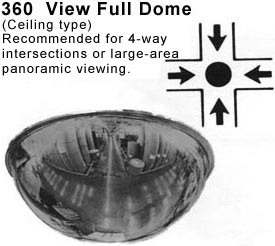
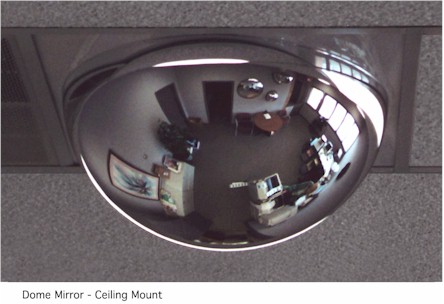
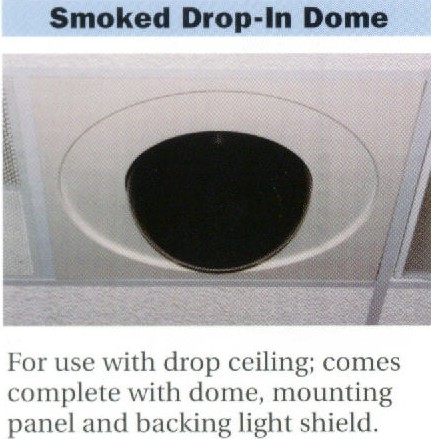
The 1/4 Dome and 1/2 dome mirrors are for inside use. They can be used outside in a protected area however, they SHOULD NOT be in the open exposed to all weather. Neither of these mirror have sealed lenses and the mirrored backing may eventually detach from the lens. The steel backed full dome can be used outside however it is not recommended. Excess water leakage through the hanging bracket rivet holes could eventually fill the dome with water. We have never seen this happen but it is possible. If you are in a dry area or you can add a protective cover over the top of the mirror then it should last for a long time. Viewing Distance: The distance you can see objects in a dome mirror is much different than the round convex mirrors. Objects seem much smaller because of the wide area a dome mirror will reflect. When sizing dome mirrors you should base your viewing distance on 1/2 the size. For example, a 12" 1/4 dome is actually only 6" tall. So the effective viewing distance (the distance you are standing from the mirror when looking at it) would be 6 feet. An 18" dome should be used when you are at a distance of around 9 feet etc.. The effective reflective distance for dome mirrors is around 25 feet. If you need to clearly see objects farther than 25 feet I would not suggest using a dome mirror. You should consider a round or rountangular convex mirror. Generally speaking, dome mirrors should be used to see wide areas where the maximum distance your wanting to view is around 25 to 30 feet or less. Dome mirrors work well in hallways and smaller areas where the objects are going to be relatively close (10 to 20 feet) to the mirror. As an added note: Technically the reflected distance is infinite. The problem is that distant objects are so small that you will not be able to reliably recognize them. These numbers are, however, variable. Standing close to a 26 (13" tall) dome mirror will allow you to see objects farther away then if standing the same distance from a 12" (6" tall) mirror. The reason is because as the dome gets larger, the mirrored lens has less curvature. Objects appear larger in larger mirrors. In order to determine the size dome mirror you should use, 1st consider how far form the mirror you will normally be standing. If you would normally look at the mirror from 10 feet, then you could use an 18" (9" tall) or a 26" (13" tall) mirror. Next consider how far away from the mirror objects will be that you need to see or watch. If the objects (for example a doorway or entrance area) is around 20 feet, then the 18" mirror would be fine. If the objects or area are 25 to 30 feet away, then you should go to the larger size. In this example that would be a 26" dome. If the size of the dome mirror is not a concern and you really need to clearly see an area, step up to the next larger size.. in this example that would be a 32" dome mirror. 1/4 Dome Mirrors: (Web Page) The 1/4 dome mirrors are used for "L" intersecting hallways or corners of a room. When placed in a corner, you can see an entire room by looking at the mirror. This is good for an office to be used when your back is turned toward the door. Often times when your working on your computer. A quick glance at the mirror will allow you to see if anyone is walking into your office. In a hallway, you can see around a corner to avoid others walking from the opposite direction. There are "lens only", "hardboard back" and "steel back" versions available. The hardboard backing and steel backing have hangers attached to the backing which make the mirror easy to install. We do not suggest getting the "lens-only" 1/4 domes unless you have a specific need for only the lens. There is a 3/4" flange around the top front of the 1/4 dome which can be used to hang the mirror. You will need to gently drill two holes (one about 1" from each end) in the flange to hold the dome against the ceiling. A "lens-only" dome is sometimes the best choice however the person doing the hanging should be careful when drilling the holes in the flange. They should also be careful not tighten the screws to tight or the flange will crack. In most cases the hardboard back is what you need. In some cases, as in the food industry, the steel back may be preferred. Not because of its strength, but because because hardboard is a wood product and not suitable for some areas. 1/2 Dome Mirrors: (Web Page) The 1/2 Dome mirrors are mostly used at "T" intersecting hallways. They may also be used on any flat wall where there is no corner to mount a mirror. When facing a 1/2 dome, you can see 90 degrees to the left and 90 degrees to the right. Persons coming from either the right or left can also see 90 degrees and therefore would be able to see you as well. Placed on a flat wall in a room with cubical offices will allow persons to see around the office without standing up to look over their wall. We have seen 1/2 dome mirrors used in many different places so your not limited to the uses described above. Just remember, images appear very small in dome mirrors so what your wanting to see should be rather close. Do not place a dome mirror in a parking lot expecting to see cars coming from 100 to 200 feet away. Even something as large as a car will only appear on the mirror in an area of about the size of a dime. Dome mirrors are only useful in areas where the distance you need to see an object is 30 feet or less. The "Lens-Only" version has no backing and must be fastened to the wall using the screw holes in the flange. NOTE: Lightly tighten the screws by HAND to avoid breaking the flange. There is one hole on each side and one in the middle of the flange. A "lens-only" 1/2 dome can be securely mounted however the person doing the hanging should be careful if drilling holes in the flange. They should also be careful not to tighten the screws to tight or the flange will crack. In most cases the hardboard back is preferred. There are mounting brackets attached to the hardboard and steel backed mirrors which make the 1/2 dome very easy to install. As with the 1/4 dome, there is no advantage to getting the steel backed 1/2 dome unless you can not use wood products in your area, as in the food industry. You may also opt for the steel back if the area is going to be extra humid or wet. The hardboard back is not weatherproof so there is no question that steel will outlast the hardboard in wet conditions. (Note: Water can accumulate in the bowel shape of a 1/2 dome mirror so do not allow water to run down into the mirror. This could damage the mirror over time. Full Dome Mirrors: (Web Page) Full dome mirrors are like cutting a basket ball in half. One half of a basket ball is the shape of what we call a Full Dome. Full dome mirrors are used where persons are looking at the mirror from every direction or where there is no wall to mount a 1/2 or 1/4 dome mirror. For example a four-way hallway intersection. Full domes are mounted from the ceiling and hang downward. There is a flange around the full dome mirror which may be used to hang the mirror. For the "lens-only" version you can drill three or four holes evenly around the flange. The lens can be mounted directly against the ceiling with screws or you can hook three (or four) chains to the holes for hanging from a ceiling. The Hardboard or Steel Backed full dome has three mounting brackets attached to the back so chains can be fastened to the brackets. The backing will also prevent dirt or dust from building up inside the bowel shaped mirror. You can also use mirror mounting brackets to hold the mirror to the ceiling, or screws running through the rubber rim. There is no standard way of mounting dome mirrors so one should always use their best judgment for the application. Drop-in Full Dome Mirrors: (Web Page) When you hade a dropped or "suspended" ceiling which uses 24" x 24" or 24" x 48" ceiling tiles, you should consider using the Drop-in dome. The Drop-in dome is a one-piece mirror with the dome mirror blown from a single 23 7/8" x 23 7/8" square sheet of acrylic then coated with a mirrored finish. The portion around the dome mirror is painted white to roughly match a standard white ceiling tile. The mirrored dome is available is one size 24" (actually 22 1/2"). This is the easiest ceiling dome mirror to install because all you do is remove a ceiling tile and replace it with the dome mirror. There is a 48" ceiling tile dome mirror but the mirror is still only 22 1/2" in diameter. The backing or flange around the mirror is 23 7/8" x 47 7/8" so it will replace a 2' x 4' ceiling tile. See-through Full Dome Mirrors: (Web Page) The see-through dome mirror is like the Drop-in Full dome mirror with two exceptions: 1) The mirrored backing has the see-through finish so a camera can be placed behind the mirror. 2) The mirror is available in two sizes, 18" and 24" (22 1/2). Smoked Domes - One Piece: The one piece smoked dome is similar to the above Drop-in full dome mirrors only it is a smoked finish and can be used to house a camera. Smoked Domes - Two Piece: (Web Page) These are NOT MIRRORS. They are to be used to house cameras, or to be used as fake camera housings. There are three sizes, 9", 12" and 22". The backing plate is the same for all three styles. The only difference is the size of the dome and the spacer ring around the dome. Remember when sizing the dome for a camera, remember the size is the diameter of the top of the dome. The depth of the dome is 1/2 the diameter so a 9" dome is 4 1/2" deep. We do not sell or claim to know technical specs of cameras or their mounting brackets but there are a few suggestion which may help in an installation. 1) A piece of hardboard (the brown stuff that pegboard is made from without the holes) cut to the same size as the backing plate or ceiling tile makes a good mounting surface for the camera. Once the camera is mounted and is working without the dome covering it, you can lift the board you've mounted the camera onto and slide the drop-in dome under it. The hardboard used to mount the camera will then serve to keep out dust and light as well as hold the camera. 2) Avoid any lights or sunlight from a window shinning directly at the dome housing. Light shinning directly at the dome will shine into the housing and reflect off the camera. When this happens the camera will be looking at a reflection of itself on the inside surface of the dome housing. You will also be able to see the camera through the dome, which is typically not something you want. The best situation is for the lighting to be above the level of the dome. For example most suspended ceilings have the light recessed into the ceiling so it would not be a problem. If however the dome is in front of a window or a spot light is pointing at the dome, you may have the problems describer above. If this is a situation, which cannot be avoided, then you will have to block the light by adding some black felt inside the dome on the side the light is coming in. Each situation is a little different so there is no canned method available to solve this problem. Black (Acrylic) spray paint or silver paint for the see-through dome can also be used to block light. You need to be careful not to cover the area where he camera will be looking out. A piece of paper and painters trim tape can be used to mask off the camera viewing area. Painters trim tape has a very weak adhesive so the mirror coating should not be damaged when it is pulled off. Also, use a light coat of paint. It's always easier to go over it a second time then to ruin the mirror finish with a thick coat of paint. 3) Use a camera capable of picking up very low light. Both the smoked domes and the mirrored see-through domes only allow about 30 to 40% of the light to pass through to the camera. A camera made to pick up normal light will not work well. If you think of anything else we should add to this area, please send us an email or call us. (Contact Us) |
| Use the Links on the right to see pricing and to order. Example; "Round Convex" for the Acrylic and glass round convex "360 degree" mirrors.. etc.. |
- Item Total: $0.00


|
Questions, help, or order by phone: (770) 642-2104 8:30 to 5:30 M-F EST Fax questions or quote requests to (770) 642-8246. Please include a return phone number and City/Zip for shipping calculations. **** Quantity Discounts Available **** |
|
Reflection Products, USA. All Rights Reserved RETURN TO TOP |